Sea Eagle offers a wide range of inflatable boats, kayaks, paddleboards, and a canoe to meet the need of almost every kind of boating experience.
Cart
0
Product:
Products:
(empty)
No products
To be determined
Shipping
¥0
Total
Product successfully added to your shopping cart
Quantity
Total
There are 0 items in your cart. There is 1 item in your cart.
Total products
Shipping
To be determined
Total
How to Follow the Instructions:
As you watch the video, you can read the main points below. There are also photos and video caption times to help you keep your place. PAUSE and PLAY as you go.
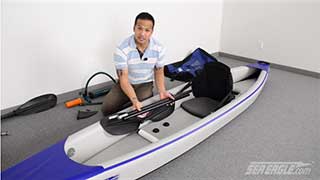
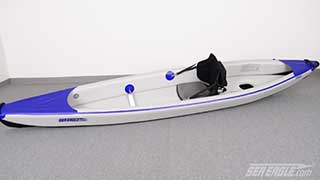
- (0:10) The Sea Eagle RazorLite™: The world’s first high performance all Drop Stitch inflatable kayak.
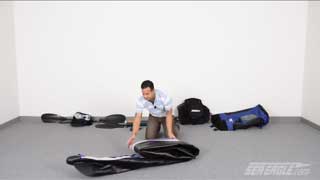
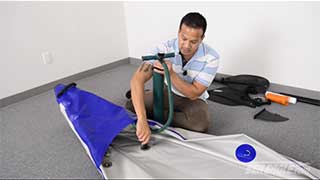
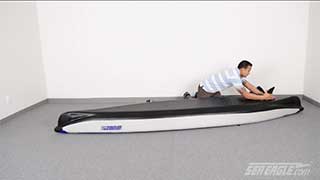
- (0:19) Unpack and unroll your kayak on a flat surface.
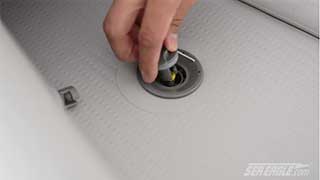
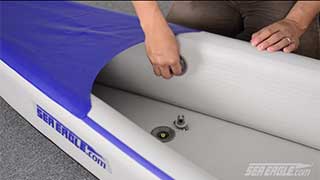
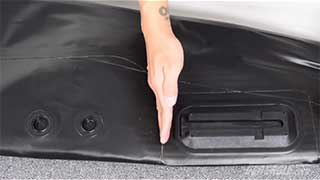
- (0:29) There are 3 recessed air valves in the front of the kayak. One for the floor, and one for each side chamber.
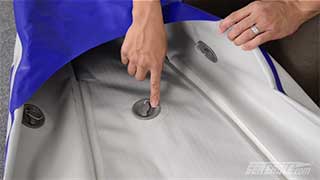
- (0:37) Remove the cap and press and turn the valve stem a ¼ turn to the left until it pops up. It is now ready to retain air. (Since this is a one-way valve, air can go in but not come out. When the valve is in the down position, air can go in and out)
- (0:50) High volume, high pressure piston pump: attach the inline pressure gauge to the handle of the pump where it says “INFLATE.”
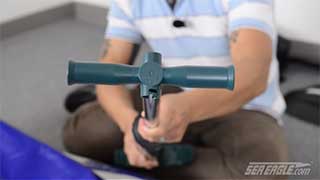
- (1:07) Attach the pump hose to the pressure gauge.
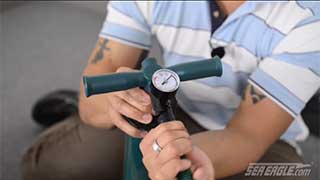
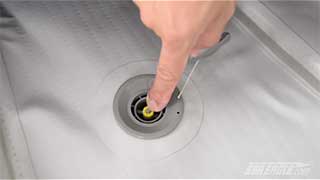
- (1:14) Place the hose adaptor into one of the 3 air valves of the kayak. Turn to the right until it’s tight. There is no particular order for inflating the RazorLite™. Inflate all 3 chambers to 10 PSI (69 kPa). Only use Sea Eagle approved pumps. Never use an air compressor.
- (1:42) Sea Eagle also has electric pumps (special order). Email: [email protected]
- (2:15) Replace the 3 air valve caps.
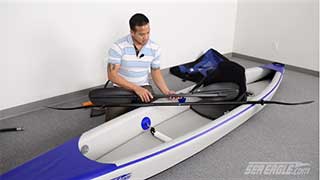
- (2:25~3:16) The TBS (Tall Back Seats) have 4 straps: Two connect to the front D-rings and two connect to the back D-rings. Adjust as you like.
- (3:17~4:32) The original footrest has been replaced with the FlexBrace™ - Setup Instructions
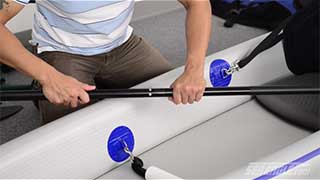
- (4:35) 4-Part AB40 Paddle: There are 2 blades, 2 drip guards, and 2 shaft sections.
- (4:55~5:29) Take the shaft section with 3 pre-drilled holes on one end and one hole at the other end. At the end with one hole, slide on a drip guard and then attach a paddle blade. Repeat with the other shaft, drip guard and paddle blade.
- (5:30) Assemble the two shafts. There are 3 positions for feathering.
- (5:57) 2-Part AB50 Carbon Fiber Paddle: 227 g lighter than the AB40 paddle. Great for touring and paddling in cold conditions as the carbon fiber shafts don’t transmit cold temperatures, so you hands don’t get so cold.
- (6:15) Assemble the two shafts. There are 3 positions for feathering.

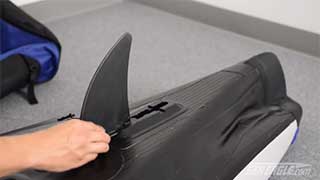
- (6:30) Flip the RazorLite™ over. Slide in the skeg and clip.
- (6:40) Flip the RazorLite™ over, reposition the seat, and you are ready to go! Because of its design and world’s first all Drop Stitch construction, the Sea Eagle RazorLite™ can be inflated to a higher pressure than any other inflatable kayak. This makes a sleeker, rigid, contoured shape that is incredibly faster, lighter, and higher performing than any other inflatable kayak on the market!
- (7:10) Packing up: Release the locking clip on the large skeg and slide it forward to take it off.
- (7:25) Unclip and remove the TBS and footrest.
- (7:40) To deflate, remove the valve caps and push and turn the valve stem ¼ turn to the right. Make sure your eyes and face are not directly over the valve.
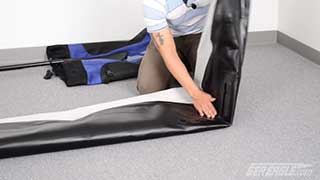
- (8:05) Fold the kayak in half. Make sure the skeg base is flat.
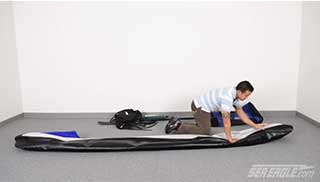
- (8:20) Make your first fold between the drain valves and skeg base when folding the RazorLite™ in order to keep the skeg base flat at all times.
- (8:25) Fold the kayak towards the front.
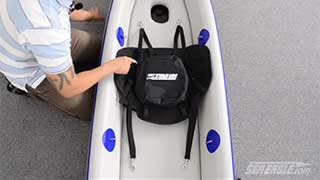
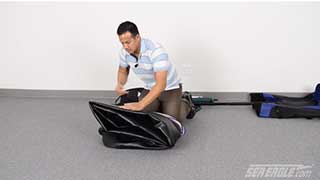
- (8:40) Push the air out and pack the kayak and all the accessories in the Sea Eagle All-Purpose Backpack.
Have fun paddling in your new Sea Eagle kayak!