Sea Eagle offers a wide range of inflatable boats, kayaks, paddleboards, and a canoe to meet the need of almost every kind of boating experience.
Cart
0
Product:
Products:
(empty)
No products
To be determined
Shipping
¥0
Total
Product successfully added to your shopping cart
Quantity
Total
There are 0 items in your cart. There is 1 item in your cart.
Total products
Shipping
To be determined
Total
How to Follow the Instructions:
As you watch the video, you can read the main points below. There are also photos and video caption times to help you keep your place. PAUSE and PLAY as you go.
- (0:20) NeedleNose™ Stand Up Paddleboards (SUPs) come in various sizes to suit your specific needs and performance desires.
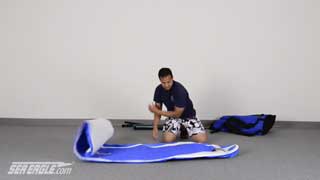
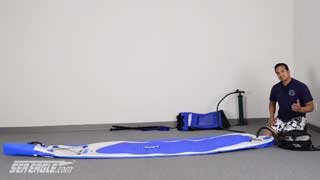
- (0:30) Unpack and unroll your SUP on a flat surface.
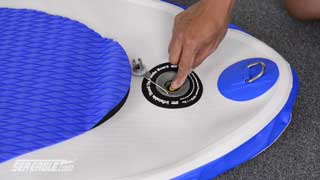
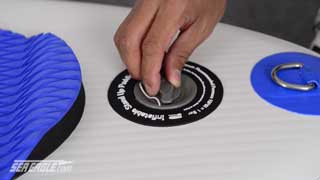
- (0:37) There is one recessed air valve at the back-end of the board. Remove the cap and press and turn the valve stem a ¼ turn to the left until it pops up. It is now ready to retain air. (Since this is a one-way valve, air can go in but not come out. When the valve is in the down position, air can go in and out)
- (0:50) High volume, high pressure piston pump: attach the inline pressure gauge to the handle of the pump where it says “INFLATE.”
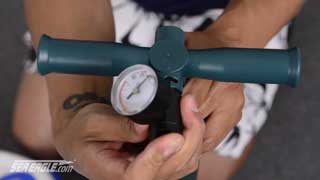
- (1:04) Attach the pump hose to the pressure gauge.
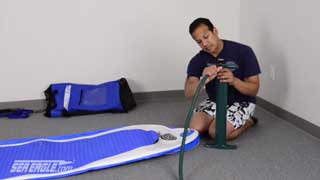
- (1:08) Place the hose adaptor into the air valve. Turn to the right until it’s tight. Inflate to 12~15 PSI (83~103 kPa). Only use Sea Eagle approved pumps. Never use an air compressor.
* Don’t underinflate or overinflate the board as this may result in instability and poor performance.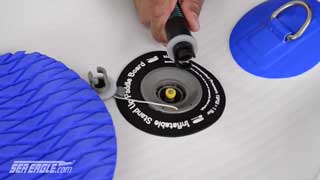
- (1:25) Sea Eagle also has electric pumps to make inflation even easier.
- Replace the air valve cap.
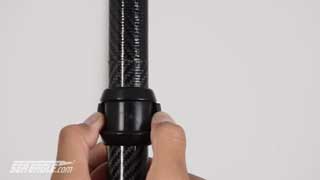
- (1:33) Assemble the 3-part SUP paddle by turning over the lower blade and attach it to the middle section. Next, turn the paddle over so you can see the Sea Eagle logo. Loosen the collar, slide in the handle with the size markings facing up like the Sea Eagle logo, and tighten at the desired paddle length. This is important so that the handle is in the correct orientation with the paddle blade. (Information has been added to the written description)
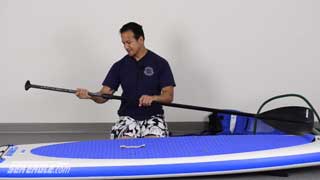
- (1:45) The SUP paddle is adjustable from 170~215 cm. The Carbon fibre SUP paddle is adjustable from 188~208 cm. Just release the locking mechanism, adjust to your liking, and lock again.
- (2:00) The last step is to insert the slide-in skeg and clip. You can insert it while inflated OR deflated. This is a great feature! With the skeg, your board will track straight and true. Without the skeg, you will be able to release the tail more easily and paddle in shallower water.
* Make sure the skeg base is free of sand.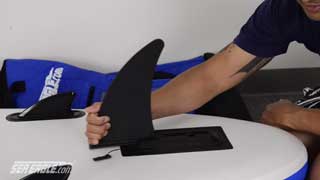
- (2:30) Packing up is quick and easy! Release the locking clip on the removable skeg and slide it forward to take it off.

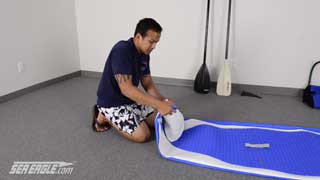
- (2:40) To deflate, remove the valve caps and push and turn the valve stem ¼ turn to the right. Make sure your eyes and face are not directly over the valve.
- (3:00) Fold the Needle Nose cone across the board. Then roll it from nose to tail (front to back).
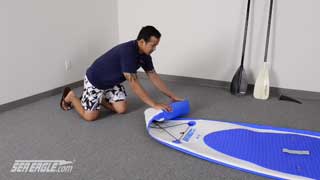
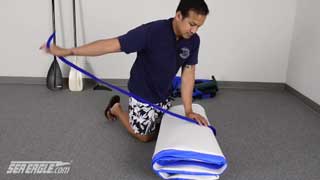
- (3:10) Helpful tip: fold the corner down to square off the board when you roll.
- (3:25) Once you have all the air out, roll it back 2 folds. Fold the tail-end over keeping the skeg base FLAT.

- (3:50) Put the strap around the board to keep it rolled up tightly.
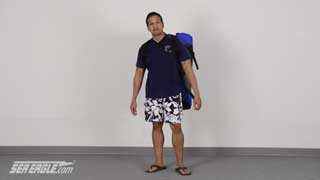
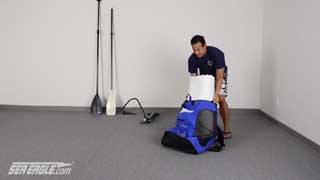
- (4:00) Put the board and all accessories in the All Purpose Backpack.
- * To learn how to inflate and attach the Deluxe Kayak Seat (Deluxe Package) as well as kayak paddle assembly, please watch the LongBoard Hybrid video from (4:27~7:35)
Have fun paddling in your new Sea Eagle SUP!